Wednesday, March 17, 2021

Overprovisioning vCPUs in ESXi as a VMWare guest

Background

I have a large server (96 vcpus and 1TB RAM) for working on cloud projects. A limitation, however, is that VMWare Workstation Pro 16 has a limitation of allocating a max of 32 vCPUs and 128GB RAM to any one guest VM. Normally this isn't a problem, but when you're dealing with OpenShift and Watson AIOps on-prem install, that's not enough. Specifically, Watson AIOps states that it requires a minimum of 36 cores for the all of the VMs required.

Solution

It turns out that the 32 vCPU limit isn't really a problem in this case. VMWare products allow you to overprovision the host resources to guests. And ESXi doesn't have any limitations on the number of vCPUs or amount of memory you can assign to one of its guests. This means that I can run ESXi as a guest under VMWare Workstation, and allocate more than the 32 vCPUs to its guest VMs. Here's a picture that I think clears up the situation:


As you can see, my ESXi guest (32 vCPUs) has three guest VMs that are using a total of 42 vCPUs, and they're all running fine. If all of the vCPUs get busy, performance will degrade, but I don't expect that to ever happen in my lab.

I've seen discussions where people overprovision vCPUs in a ratio of up to 4:1, meaning that I could possibly allocate 128 vCPUs in my ESXi guest as long as the guest VMs aren't too busy.

Tuesday, March 16, 2021

Troubleshooting Red Hat CodeReady Containers

Background

I've been working with Red Hat CodeReady Containers (CRC) recently, and found that I've had to look all over the place to find even the most basic troubleshooting information. For example, here is the link to the Troubleshooting chapter of the official documentation. Go read it. If you don't think you have time, you're wrong. It will take you about 30 seconds. I'm writing this post to provide a little information that I've found to be useful. It's certainly not everything you need, but it's enough to get you pretty far, and it is infinitely more information than in the link above.

Environment

Here is a diagram that shows my configuration for CRC:


Other than the memory and CPU specs, this is a pretty common configuration for CRC. 

When troubleshooting CRC, your Physical Host Machine and your virtualization software (VMWare Workstation 16 Pro in my case) don't really come into the picture too much. They generally do their job and are transparent to what you're doing, so I'm not touching on those. The systems you're actually going to look ar are your Guest VM, crc VM, and crc pods.

Guest VM

What I'm calling the Guest VM is the system on which you've downloaded and plan to run CRC. So in your case, this could actually be your laptop. But Guest VM is what I'm calling it. This is where most of your troubleshooting will be done if you're having problems getting the crc VM to start, which is what I have encountered most often. I am using libvirt, KVM, and qemu, which is the default/normal configuration on Linux. Information on how these three components work together can be found at this link.

crc VM log file

The most important file to know about is the crc VM log file created by qemu. That file is:

/var/log/libvirt/qemu/crc.log

This is the console output of the crc VM, so it will show you exactly what's happening in the VM as it is booting up.

virsh command

The virsh command is included in the libvirt package. This command allows you to interact with libvirt/KVM/qemu VMs on your system, like the crc VM. The important thing to note is that you need to run this command as root. As root, you can run the following command to see a list of all VMs running:

virsh list --all


virsh is a complete terminal environment, with tons of additional commands that can be run interactively. 

virt-manager

I actually found this before I found the above log file. Now that I know the location of the log file, I've found that this tool isn't as useful, but I wanted to include it anyway.

Install virt-manager on your Guest VM with yum. You can then launch it with the command virt-manager, which will bring up the application window:


You can then click on the crc VM to see the console. There is no way to actually log into the crc VM because you can only log in via the core user's private key (shown later). Googling around, I see that password access has been requested/suggested, but there appears to be no plan to implement it at this time.

crc VM

crc pods log files

If the crc VM is up and running, you can ssh into it with this command:

ssh -i ~/.crc/machines/crc/id_ecdsa core@api.crc.testing


Once inside the crc VM, you can cd to /var/log/pods and you will see one log file for each pod created.

That's all for now

As I said in the beginning, I just included a few tools, but this is more than in the product documentation. CRC and OpenShift are really complex frameworks that rely on tons of components like libvirt, Kubernetes, and tons of other complex components. It is understandable why it's so hard to troubleshoot. However, I personally believe that the development team could include more logging information in the web console itself so that users/operators of the system have access to the data without having to separately open a terminal window.

Monday, March 15, 2021

Increasing the crc VM disk size for CodeReady Containers

Background

Red Hat CodeReady Containers (CRC) is a single-machine install of Red Hat OpenShift Container Platform (OCP), which is Red Hat's implementation of Kubernetes (K8s), with lots of other things on top. CRC allows you to run a full OCP instance on a single machine. This is really nice, since a full OCP install requires at least 9 (!) machines/VMs, with a pretty painful setup. The way CRC accomplishes this is to create a single VM (named "crc") that runs every part of the cluster. This is great for developers because they can develop cloud-native apps right on their laptop with just a bit of effort.

The problem I ran into was that my use case (trying to install Watson AI Ops Event Manager on CRC) kept failing because the crc VM kept running out of disk space, and there is no way to tell CRC to provision a larger disk. You can set the number of CPUs and amount of memory for the crc VM to use, but not the amount of disk space. I thought that this would be easy, but I was wrong, and that's why I'm writing this blog post.

Versions and hardware specs

I downloaded CRC 1.23.1 for this. Red Hat releases a new version about every 30 days, so YMMV. The main VM I installed (to act as my local machine) was a CentOS 7 VM with 16 CPUs and 128GB RAM. I'm running this VM in VMWare Workstation 16 Pro on a CentOS 7 host with 24 cores and 256GB RAM.

Start

After downloading CRC from Red Hat (https://cloud.redhat.com/openshift/create/local), you will run:

./crc setup

This will create a ~/.crc directory for your user. In this directory, you'll find a few files and directories, but the one we're interested in and need to change to is:

cd ~/.crc/cache/crc_libvirt_4.7.0

In this directory are the two files you'll need to modify:

crc.qcow2 - the virtual machine image for the crc VM. The operating system of this VM is called Red Hat Core OS (RHCOS), and is based on Red Hat 8.
crc-bundle-info.json - text information about the VM that needs to be manually edited after we modify crc.qcow2.

I found the information at this link: https://github.com/code-ready/crc/issues/127 extremely useful, but not quite complete, probably due to a change in CRC at some point. 

First Issue

My main VM is CentOS 7, which means that I need a different VM (CentOS8 or RHEL8) to actually make the changes. (I actually tried running CRC in a CentOS8 VM, but that failed miserably.) So I created a separate CentOS8 VM where I can do the work needed. That VM needs to have the following packages installed:

libguestfs-tools 
libguestfs-xfs 

Increase the disk size of the crc.qcow2 image

You need to copy the crc.qcow2 file to the CentOS8 machine and run the following commands. I wanted to add 900GB to the disk.

CRC_MACHINE_IMAGE=${HOME}/crc.qcow2

sudo qemu-img resize ${CRC_MACHINE_IMAGE} +900G

sudo cp ${CRC_MACHINE_IMAGE} ${CRC_MACHINE_IMAGE}.ORIGINAL

# user qemu needs access to the file AND the directory containing the file.

sudo chown qemu.qemu crc*

sudo mv crc* /tmp

cd /tmp

sudo virt-resize --expand /dev/vda4 ${CRC_MACHINE_IMAGE}.ORIGINAL ${CRC_MACHINE_IMAGE}

# The above command took 30+ minutes on my machine.


This is what success looks like at the end of the command:

Resize operation completed with no errors. 
Before deleting the old disk, 
carefully check that the resized disk boots and works correctly.


You can delete the crc.qcow2.ORIGINAL file.

Copy the crc.qcow2 file back

Now that you've modified the file, you need to copy it back to the same directory where it came from on the CentOS7 machine. You also need to change the owner and group to qemu.

Get the sha256sum value and size of the file

Run the following command to get the sha256 checksum for the qcow2 file:

sha256sum crc.qcow2

01839ceda9cad333d7ae9f5033a54c528698ec70bdde2077a7669efd9cf923c9


To get the size in bytes, run 'ls -l'.

Edit the crc-bundle-info.json file

Find the "storage" stanza, which will look like this:

  "storage": {
    "diskImages": [
      {
        "name": "crc.qcow2",
        "format": "qcow2",
        "size": "10867572736",
        "sha256sum": "01839ceda9cad333d7ae9f5033a54c528698ec70bdde2077a7669efd9cf923c9"
      }
    ]
  },

Change the values for size and sha256sum to match the commands you ran above.

Why?

This is required to ensure that your modified crc.qcow2 file is the one used by CRC. If you don't make this change, then the next time you run 'crc stop; crc delete; crc cleanup; crc setup; crc start', the original crc.qcow2 file will be extracted and used.

Now run 'crc start'

If you haven't alread run 'crc setup', you need to do that first. But 'crc start' is the command that will actually create the ~/.crc/machines/crc directory that will contain the crc.qcow2 file and config.json, which we're about to edit. The command will fail because the size of the disk is different from the size specified in the config.json file. The error will look like this:

INFO Creating CodeReady Containers VM for OpenShift 4.7.0...

Error creating machine: Error creating the VM: Error creating machine: Error in driver during machine creation: current disk image capacity is bigger than the requested size (999653638144 > 33285996544)


Happily, that number "999653638144" in the error is the exact value you need to enter in the config.json file. Edit config.json and search for "DiskCapacity". The value there is the original value for the image. Change the value to be the number above - in my case it is 999653638144. Yours will be different unless you chose to increase the disk by 900GB. Save your change to the file, and run 'crc start' again. Now crc VM should start up. You can ssh to the crcVM with the command:

ssh -i ~/.crc/machines/crc/id_ecdsa core@api.crc.testing


Once in the machine, you can run 'df -h' to verify that the /sysroot filesystem is the new, larger size.


Thursday, March 11, 2021

VMWare Workstation 16 Pro on Windows 10 Shared Folders Not Available In Linux Guest

 This is a small problem with an easy fix, but I wanted to document it for others.

Running VMWare Workstation 16 Pro on Windows 10 Pro, when you create a Linux guest VM with Shared Folders enabled, the shared folders don't always show up in the guest VM. In the guest VM, you should see any shared folders under /mnt/hgfs. The problem is that they aren't seen there, even if you reboot the guest VM. The silly fix is to disable shared folders for the VM from VM->Settings->Options and SAVE that. Then go back into VM->Settings->Options and enable shared folders and SAVE that. Your shared folders should now be available under /mnt/hgfs

Monday, March 8, 2021

We're still your go-to experts for all IBM ITSM products

 While we've been posting about other products, our primary focus remains the IBM suite of ITSM tools, such as:

IBM Tivoli Monitoring

ITCAM

Netcool Operations Insight (and the individual products that make it up)

Watson AIOps

Instana


Our consultants have decades of experience in ITSM and ESM, and we can ensure that your implementation is successful.

Wednesday, March 3, 2021

Deleting newlines or merging two lines in a file using Notepad++

It took me longer than it should have to find this link explaining how to delete a newline or merge two lines in Notepad++:

https://stackoverflow.com/questions/11084086/notepad-merge-2-lines-into-1-line

Here's the text from the answer in case the above link disappears at some point:

Use the extended replace functionality and replace "\r\nname" with " name"

Substitute appropriate line ending characters for \r\n depending on the file.

If it is from windows, use \r\n

If it is from unix, use \n

If it is from mac, use \r

Basically, you need to find and replace the appropriate characters, and it works just like one would expect. Finding the complete set of correct characters was the key for me. Specifically, I wasn't finding "\r\n" (CRLF, the Windows newline characters). Using the above, I was able to successfully delete some spurious newlines in my data.

Monday, February 22, 2021

A new book on ServiceNow Event Management is available!

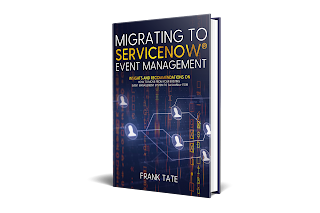
I just published my first book, Migrating to ServiceNow Event Management. In it, I provide tips and recommendations for migrating from an existing event management system to ServiceNow ITOM Event Management. The book provides details on some of the differences that exist between ServiceNow and event management systems that are not integrated with a CMDB. A large part of the book is devoted to the organizational information you need to capture to ensure a successful migration. 

It's available on Amazon in paperback or on Kindle.

https://www.amazon.com/gp/product/B08X31Y1B8