Monday, March 15, 2021

Increasing the crc VM disk size for CodeReady Containers

Background

Red Hat CodeReady Containers (CRC) is a single-machine install of Red Hat OpenShift Container Platform (OCP), which is Red Hat's implementation of Kubernetes (K8s), with lots of other things on top. CRC allows you to run a full OCP instance on a single machine. This is really nice, since a full OCP install requires at least 9 (!) machines/VMs, with a pretty painful setup. The way CRC accomplishes this is to create a single VM (named "crc") that runs every part of the cluster. This is great for developers because they can develop cloud-native apps right on their laptop with just a bit of effort.

The problem I ran into was that my use case (trying to install Watson AI Ops Event Manager on CRC) kept failing because the crc VM kept running out of disk space, and there is no way to tell CRC to provision a larger disk. You can set the number of CPUs and amount of memory for the crc VM to use, but not the amount of disk space. I thought that this would be easy, but I was wrong, and that's why I'm writing this blog post.

Versions and hardware specs

I downloaded CRC 1.23.1 for this. Red Hat releases a new version about every 30 days, so YMMV. The main VM I installed (to act as my local machine) was a CentOS 7 VM with 16 CPUs and 128GB RAM. I'm running this VM in VMWare Workstation 16 Pro on a CentOS 7 host with 24 cores and 256GB RAM.

Start

After downloading CRC from Red Hat (https://cloud.redhat.com/openshift/create/local), you will run:

./crc setup

This will create a ~/.crc directory for your user. In this directory, you'll find a few files and directories, but the one we're interested in and need to change to is:

cd ~/.crc/cache/crc_libvirt_4.7.0

In this directory are the two files you'll need to modify:

crc.qcow2 - the virtual machine image for the crc VM. The operating system of this VM is called Red Hat Core OS (RHCOS), and is based on Red Hat 8.
crc-bundle-info.json - text information about the VM that needs to be manually edited after we modify crc.qcow2.

I found the information at this link: https://github.com/code-ready/crc/issues/127 extremely useful, but not quite complete, probably due to a change in CRC at some point. 

First Issue

My main VM is CentOS 7, which means that I need a different VM (CentOS8 or RHEL8) to actually make the changes. (I actually tried running CRC in a CentOS8 VM, but that failed miserably.) So I created a separate CentOS8 VM where I can do the work needed. That VM needs to have the following packages installed:

libguestfs-tools 
libguestfs-xfs 

Increase the disk size of the crc.qcow2 image

You need to copy the crc.qcow2 file to the CentOS8 machine and run the following commands. I wanted to add 900GB to the disk.

CRC_MACHINE_IMAGE=${HOME}/crc.qcow2

sudo qemu-img resize ${CRC_MACHINE_IMAGE} +900G

sudo cp ${CRC_MACHINE_IMAGE} ${CRC_MACHINE_IMAGE}.ORIGINAL

# user qemu needs access to the file AND the directory containing the file.

sudo chown qemu.qemu crc*

sudo mv crc* /tmp

cd /tmp

sudo virt-resize --expand /dev/vda4 ${CRC_MACHINE_IMAGE}.ORIGINAL ${CRC_MACHINE_IMAGE}

# The above command took 30+ minutes on my machine.


This is what success looks like at the end of the command:

Resize operation completed with no errors. 
Before deleting the old disk, 
carefully check that the resized disk boots and works correctly.


You can delete the crc.qcow2.ORIGINAL file.

Copy the crc.qcow2 file back

Now that you've modified the file, you need to copy it back to the same directory where it came from on the CentOS7 machine. You also need to change the owner and group to qemu.

Get the sha256sum value and size of the file

Run the following command to get the sha256 checksum for the qcow2 file:

sha256sum crc.qcow2

01839ceda9cad333d7ae9f5033a54c528698ec70bdde2077a7669efd9cf923c9


To get the size in bytes, run 'ls -l'.

Edit the crc-bundle-info.json file

Find the "storage" stanza, which will look like this:

  "storage": {
    "diskImages": [
      {
        "name": "crc.qcow2",
        "format": "qcow2",
        "size": "10867572736",
        "sha256sum": "01839ceda9cad333d7ae9f5033a54c528698ec70bdde2077a7669efd9cf923c9"
      }
    ]
  },

Change the values for size and sha256sum to match the commands you ran above.

Why?

This is required to ensure that your modified crc.qcow2 file is the one used by CRC. If you don't make this change, then the next time you run 'crc stop; crc delete; crc cleanup; crc setup; crc start', the original crc.qcow2 file will be extracted and used.

Now run 'crc start'

If you haven't alread run 'crc setup', you need to do that first. But 'crc start' is the command that will actually create the ~/.crc/machines/crc directory that will contain the crc.qcow2 file and config.json, which we're about to edit. The command will fail because the size of the disk is different from the size specified in the config.json file. The error will look like this:

INFO Creating CodeReady Containers VM for OpenShift 4.7.0...

Error creating machine: Error creating the VM: Error creating machine: Error in driver during machine creation: current disk image capacity is bigger than the requested size (999653638144 > 33285996544)


Happily, that number "999653638144" in the error is the exact value you need to enter in the config.json file. Edit config.json and search for "DiskCapacity". The value there is the original value for the image. Change the value to be the number above - in my case it is 999653638144. Yours will be different unless you chose to increase the disk by 900GB. Save your change to the file, and run 'crc start' again. Now crc VM should start up. You can ssh to the crcVM with the command:

ssh -i ~/.crc/machines/crc/id_ecdsa core@api.crc.testing


Once in the machine, you can run 'df -h' to verify that the /sysroot filesystem is the new, larger size.

Thursday, March 11, 2021

VMWare Workstation 16 Pro on Windows 10 Shared Folders Not Available In Linux Guest

 This is a small problem with an easy fix, but I wanted to document it for others.

Running VMWare Workstation 16 Pro on Windows 10 Pro, when you create a Linux guest VM with Shared Folders enabled, the shared folders don't always show up in the guest VM. In the guest VM, you should see any shared folders under /mnt/hgfs. The problem is that they aren't seen there, even if you reboot the guest VM. The silly fix is to disable shared folders for the VM from VM->Settings->Options and SAVE that. Then go back into VM->Settings->Options and enable shared folders and SAVE that. Your shared folders should now be available under /mnt/hgfs

Monday, March 8, 2021

We're still your go-to experts for all IBM ITSM products

 While we've been posting about other products, our primary focus remains the IBM suite of ITSM tools, such as:

IBM Tivoli Monitoring

ITCAM

Netcool Operations Insight (and the individual products that make it up)

Watson AIOps

Instana


Our consultants have decades of experience in ITSM and ESM, and we can ensure that your implementation is successful.

Wednesday, March 3, 2021

Deleting newlines or merging two lines in a file using Notepad++

It took me longer than it should have to find this link explaining how to delete a newline or merge two lines in Notepad++:

https://stackoverflow.com/questions/11084086/notepad-merge-2-lines-into-1-line

Here's the text from the answer in case the above link disappears at some point:

Use the extended replace functionality and replace "\r\nname" with " name"

Substitute appropriate line ending characters for \r\n depending on the file.

If it is from windows, use \r\n

If it is from unix, use \n

If it is from mac, use \r

Basically, you need to find and replace the appropriate characters, and it works just like one would expect. Finding the complete set of correct characters was the key for me. Specifically, I wasn't finding "\r\n" (CRLF, the Windows newline characters). Using the above, I was able to successfully delete some spurious newlines in my data.

Monday, February 22, 2021

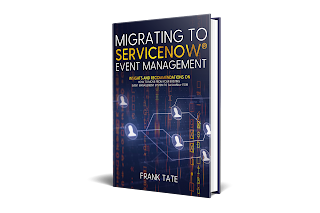
A new book on ServiceNow Event Management is available!

I just published my first book, Migrating to ServiceNow Event Management. In it, I provide tips and recommendations for migrating from an existing event management system to ServiceNow ITOM Event Management. The book provides details on some of the differences that exist between ServiceNow and event management systems that are not integrated with a CMDB. A large part of the book is devoted to the organizational information you need to capture to ensure a successful migration. 

It's available on Amazon in paperback or on Kindle.

https://www.amazon.com/gp/product/B08X31Y1B8


Tuesday, January 26, 2021

Call PowerShell script from batch file using a pseudo here file

 If you made it through the title of this post, you're in the right place. Due to security restrictions on a Windows 10 machine I was using, I needed to run a group of PowerShell commands in a single command from a batch file, and I found the solution here:

https://dmitrysotnikov.wordpress.com/2008/06/27/powershell-script-in-a-bat-file/

Basically, you enclose the whole set of commands in curly braces, encode those to a Base64 string, then pass that encoded string to the PowerShell command with the -EncodedCommand parameter. This encoded string is the "pseudo here file" mentioned in the title.

I needed the same code run every time, so the manual step of copy-and-pasting the encoded string wasn't a problem for me. If you need to programattically modify the code that needs to run, you're on your own. 

Tuesday, December 29, 2020

ServiceNow Event Rules: No support for If..Then..Else in regex

The Transform and Compose Alert Output section of an Event Rule in ServiceNow allows you to use regular expressions and grouping to parse data in incoming events. Almost full regular expression support is provided, but I wanted to point out one feature that's definitely not supported as of the Paris release: if..then..else conditionals. Here's a great description of this feature from regularexpressions.info. Basically, the format of this conditional is:

(?(condition)(then)|(else))

It's somewhat esoteric, but it can be useful in cases where you have two different string formats that you want to parse in a single event rule. I just tested this thoroughly on my dev instance, and it absolutely is not supported. While you can save the event rule with this syntax, you'll eventually see an error stating:

Invalid Regular Expression Field

I believe this is due to the fact that the regular expression engine does not support "lookbehind" (limitation documented here). In any case, it's not supported. I just wanted to document my findings here to save others a little headache.

Update 1/3/2021

The official name for this is Conditional Lookahead. You can play around with it at http://regex101.com if you're interested. 

And to make sure I was doing it correctly, I also tried this syntax in the Event Rule transform:

(?(?=my_pattern)(\d+)|(\w+))

This works in regex101, but gives the Invalid Regular Expression Field in the ServiceNow interface.