If you're not a member of the IBM Middleware User Community, you'll need to sign up for free to access this video, but I think it's well worth it:
https://www.imwuc.org/p/do/sd/sid=3340&source=6
Here are a couple of screenshots to show you the kind of detail covered:
The speakers in the video are:
Krishna Kodali, Sr. Software Engineer, IBM - Krishna Kodali is a Senior Software Engineer at IBM, he provides support and consultation for Netcool Product Suite. He has been working with Netcool Product Suite since 2005 and is a worldwide Subject Matter Expert (SME) for IBM Tivoli Network Manager (ITNM). He offers guidance in design and implementation for any size of deployment. Krishna has a Bachelor’s degree in Engineering and is a Cisco Certified Network Professional (CCNP). He specializes in Network Technologies, System Management, IT Service Management, Virtualization, SNMP and Netcool.
John Parish, Technical Enablement Specialist, IBM - John Parish has been teaching IBM courses for the past 10 years.
Friday, December 16, 2016
Wednesday, November 16, 2016
PINK17 Feb 19-22, Las Vegas
I'm attending the Pink Elephant 2017 IT Service Management Conference and Exhibition Feb 19-22 in Las Vegas. To all of my associates and friends, please let me know if you're going so we can try to connect.
Friday, November 4, 2016
IBM's Cloud Business Partner Advisory Council in New Orleans was amazing
This was the first BPAC I've attended, and I hope to be invited to many more. We got to get to know our VP enablement team and have some great fellowship all around. I got to make new friends at Lighthouse, gen-E, Flagship, Perficient, ne Digital, Sirius, Avnet, Arrow and others. Thank you Dave Hock, Bob Miller, Joh Donaldson, Don Stough, Rene Ferguson, Melissa Hadley and all other IBMers involved for pulling off a great event.
If you're an IBM Business Partner, you need to make sure to keep in touch with the IBM BP team. There was great information presented and just an outstanding sharing of ideas to help everyone be successful.
We look forward to seeing everyone in March in Vegas at InterConnect if not before!
Wednesday, October 5, 2016
Cloning Maximo 7.6
Richard Lesses has created a great article on cloning Maximo 7.6 here:
https://www.ibm.com/developerworks/community/blogs/a9ba1efe-b731-4317-9724-a181d6155e3a/entry/Cloning_Maximo_7_6?lang=en
In the comments you'll also find a link to this MSSQL script that Brian Baird uses to update several values after cloning:
https://www.ibm.com/developerworks/community/blogs/a9ba1efe-b731-4317-9724-a181d6155e3a/entry/Cloning_Maximo_7_6?lang=en
https://www.ibm.com/developerworks/community/blogs/a9ba1efe-b731-4317-9724-a181d6155e3a/entry/Cloning_Maximo_7_6?lang=en
In the comments you'll also find a link to this MSSQL script that Brian Baird uses to update several values after cloning:
https://www.ibm.com/developerworks/community/blogs/a9ba1efe-b731-4317-9724-a181d6155e3a/entry/Cloning_Maximo_7_6?lang=en
Tuesday, September 20, 2016
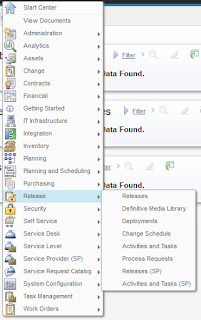
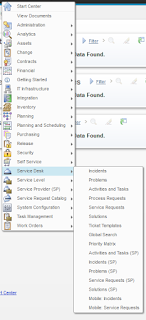
All of the applications included in IBM Control Desk for Service Providers 7.6 and 7.6.0.1
Just thought this would be useful information to publish. Screenshots of all of the Applications you can select from the "Go To" menu and submenus in ICD 7.6 and 7.6.0.1
Friday, September 9, 2016
Adding an additional hostname to Maximo on WebSphere and IBM HTTP Server
When you install Maximo (IBM Control Desk in this case) on IBM HTTP Server and WebSphere, the installation creates all of the virtual hosts you need based on the hostname of the IBM HTTP Server(s) that you include in your environment. However, you may need users to access the application using a different hostname (maybe one that's accessible from the Internet, for example). If you simply add a DNS CNAME record for your web server, you'll get an error when you try to access the application with that hostname.
To fix this problem, you need to add a Host Alias to each of the appropriate Virtual Hosts that you have defined for Maximo, then restart the application server(s). Here's how:
1. In my environment, I want to be able to access Maximo using the URL:
http://icdcommon/maximo
The two servers participating in my cluster are named icd1 and icd2. I'm adding an entry in my /etc/hosts (or \windows\system32\drivers\etc\hosts) file for icdcommon to be an alias for icd1.
(In a real environment, you would be modifying DNS appropriately).
2. Log into the WebSphere admin console at http://dmgr_host:9060/admin
3. Navigate to Environment->Virtual Hosts, where you will see multiple virtual hosts. I have the application configured in a cluster named MXCLUSTER, so the virtual hosts of interest to me are:
MXCLUSTER_host
default_host
webserver1_host
4. For each of the above Virtual Hosts, click on that host then click the Host aliases link.
5. Click the New button to add a new entry and in that entry, specify:
Host Name: icdcommon
Port: 80
6. Click OK, then click the save link at the top of the page (or you can wait until your done to click save).
7. Once you've done the above for each of the three Virtual Hosts, you need to restart all IBM HTTP Servers AND all application servers.
8. Now you should be able to access the application with http://icdcommon/maximo (you may need to restart your browser).
Thursday, September 8, 2016
Installing IBM Control Desk 7.6 on RHEL 6.5 in a test environment
The biggest hitch you'll encounter when installing ICD 7.6 on Redhat Linux in a dev/test environment is the error
CTGIN8264E : Hostname failure : System hostname is not fully qualified
And the reason it's a big hitch is because the error is misleading. You do need to have your hostname set to your FQDN, but you also need to have an actual DNS (not just /etc/hosts, but true DNS) A record for your hostname. If you don't already have one that you can update, you can install the package named:
The Berkeley Internet Name Domain (BIND) DNS (Domain Name System) server
It is available on the base Redhat install DVD.
Friday, July 1, 2016
Accessing the CTGINST1 DB2 Instance From the Command Line Processor
When you install IBM Control Desk 7.6 on Windows, you actually have two DB2 instances created - DB2 and CTGINST1. The one with all of the data is CTGINST1, but the one that the system is configured to access is DB2. Luckily, this is easy to fix by changing the environment variable named DB2INSTANCE. After install, it is set to "DB2", and you simply need to change its value to "CTGINST1". You can do this temporarily from the command line or permanently by modifying the environment variables for the user.
Monday, June 27, 2016
Installing the ICD Demo Content along with the ICD Process Content Packs
Do NOT try to install the 7.5.1 demo data into 7.6. It really doesn't work well. I'm leaving this post intact because the steps are useful in general I believe.
If you try to install the IBM Control Desk Content Packs along with the 7.5.1 Demo Content, you're going to have problems. I already addressed a standalone problem with the Demo Content in an earlier post, and now I've gotten further, so wanted to share the wisdom I gained.
No matter which order you install - Demo Content then Process Packs (specifically the Change Management Content Pack) or the other way around - you're going to encounter the following error:
One or more values in the INSERT statement, UPDATE statement, or foreign key update caused by a DELETE statement are not valid because the primary key, unique constraint or unique index identified by "1" constrains table "MAXIMO.PLUSPSERVAGREE" from having duplicate values for the index key.. SQLCODE=-803, SQLSTATE=23505, DRIVER=4.11.69
The cause for this is that the Change Management Content Pack and also the Service Desk Content Pack specify hard-coded values for PLUSPSERVAGREEID in the DATA\PLUSRESPPLAN.xml file, when the inserts should be creating and using the next value of the PLUSPSERVAGREESEQ sequence.
In finding the above root cause, it means that there are two possible solutions to the problem, depending on the order you install things.
If you install the Content Packs before the Demo Content
So in my first run, I installed the Content Packs first, and then the Demo Content (after modifying it as explained in an earlier post). And the exact SQL statement causing this problem was:
SQL = [insert into pluspservagree ( active,calendar,changeby,changedate,createby,createdate,description,hasld,intpriorityeval,intpriorityvalue,langcode,objectname,orgid,ranking,sanum,pluspservagreeid,servicetype,shift,slanum,calendarorgid,slatype,status,statusdate,slaid,slahold,stoprpifjportt,billapprovedwork) values (?,?,?,?,?,?,?,?,?,?,?,?,?,?,?,nextval for PLUSPSERVAGREESEQ,?,?,?,?,?,?,?,?,?,?,0)]
parameter[1]=1
parameter[2]=BUS01
parameter[3]=MAXADMIN
parameter[4]=2007-10-12 12:33:55.0
parameter[5]=MAXADMIN
parameter[6]=2007-10-12 12:33:55.0
parameter[7]=P1 Incident - Respond in 30 mins. Resolve in 2 hrs.
parameter[8]=0
parameter[9]=EQUALS
parameter[10]=1
parameter[11]=EN
parameter[12]=INCIDENT
parameter[13]=PMSCIBM
parameter[14]=100
parameter[15]=SRM1002
parameter[16]=SLA
parameter[17]=BUSDAY
parameter[18]=SRM1002
parameter[19]=PMSCIBM
parameter[20]=CUSTOMER
parameter[21]=ACTIVE
parameter[22]=2011-09-14 13:26:13.247
parameter[23]=1
parameter[24]=0
parameter[25]=0
To find the constraint causing the problem, I found this page:
https://bytes.com/topic/db2/answers/810243-error-messages-key-constraint-violations
Which showed that I could find the particular constraint with the following SQL:
SELECT INDNAME, COLNAMES
FROM SYSCAT.INDEXES
WHERE IID = 1
AND TABNAME = 'PLUSPSERVAGREE'
That basically showed an index named SQL160607091434350 consisting of just the column named PLUSPSERVAGREEID.
So each row in the PLUSPSERVAGREE table should have a unique value in the PLUSPSERVAGREEID column.
Then to find the existing values in the PLUSPSERVAGREEID column of the PLUSPSERVAGREE table, run:
SELECT PLUSPSERVAGREEID from PLUSPSERVAGREE
For me, this showed values 1 through 16.
Now, looking at the sequence itself, I found that the last value assigned was 5 with this query:
SELECT LASTASSIGNEDVAL from sysibm.syssequences where seqname = 'PLUSPSERVAGREESEQ'
So to fix the problem, I altered the PLUSPSERVAGREESEQ sequence to start at 17:
ALTER SEQUENCE PLUSPSERVAGREESEQ RESTART WITH 17
After I did that, I tried again to install the Demo Content and it worked!
If you installed the Demo Content first
I take lots of snapshots of my VMs, so I could easily go back to a snapshot where I had already installed the Demo Content, to then try to install the Content Packs. That led me to see that the Change Management Content Pack has hardcoded values in the DATA\PLUSRESPPLAN.xml file (by downloading the ChangeMgtPack7.6.zip file and opening up the file). On the positive side, it appears that nothing else in the Content Pack actually references these hardcoded values, so we have the option of changing them as needed.In my particular case, I found that the following values in the PLUSPSERVAGREE table for the PLUSPSERVAGREEID column
9
10
11
12
13
14
24
25
I also found that the LASTASSIGNEDVAL for the PLUSPSERVAGREESEQ sequence was 25, so that matches up with the data.
The very lucky part for me is that there are exactly 8 rows that get inserted by the PLUSRESPPLAN.xml file, and the PLUSPSERVAGREE table doesn't have any rows with values 1 through 8!
So the solution I applied was I manually edited the PLUSRESPPLAN.xml file to set the PLUSPSERVAGREEID values to 1 through 8. Then I saved the edited file back into the zip file, created a valid ContentSource.xml file to point to it (so I could install from my local copy of the Content Pack), added my new Content Source to the Content Installer, and I was able to successfully install the Change Process Content Pack!
However, I then found that there's also a similar problem with the Service Desk Content Pack, but the same solution can't be applied. Specifically, in the Service Desk Content Pack, the DATA\SLA.xml file uses hardcoded values for the same column, but those values are 1, 3, 4 and 5, which I just used in my workaround for the Change Management Content Pack. So to fix this correctly, I looked in the Demo Content Content Pack to find out how to reference the PLUSPSERVAGREESEQ sequence, and it's actually not too bad.
So the fix I went through was to manually modify the DATA\SLA.xml file to change every element that looked like this:
<column dataType="java.lang.Long" name="PLUSPSERVAGREEID">
<value>3</value>
</column>
to this:
<column dataType="java.lang.Long" name="PLUSPSERVAGREEID">
<columnOverride>
<sequence mode="nextval" name="PLUSPSERVAGREESEQ"/>
</columnOverride>
</column>
Then like above, I saved the edited file back into the zip file, created a valid ContentSource.xml file to point to it (so I could install from my local copy of the Content Pack), added my new Content Source to the Content Installer, and I was able to successfully install the Service Desk Content Pack!
After installing, I checked the PLUSPSERVAGREE table again, and I saw that the values 26 through 29 were there, so I know my change worked.
So in my case I didn't have to change the start value for the PLUSPSERVAGREESEQ sequence, which is nice.
It was a painful afternoon, but well worth it in the end.
Wednesday, June 8, 2016
Installing ITIC and TDI on Windows Server 2012
Both of these tools use the ZeroG InstallAnywhere installer, which doesn't completely get along with Windows Server 2012. Luckily, there's an easy fix within Windows. You need to set the "Compatibility mode" to run with compatibility for "Windows 7". You need to perform this procedure on the setup.exe file for ITIC (under Install\ITIC wherever you've extracted the install images) and the install_tdiv71_win_x86_64.exe file in the TDI installer directory.
On each file, right click and select Properties.
Then on the Compatibility tab, click the "Change settings for all users" button at the bottom.
In the "Compatibility mode" section, select "Run this program in compatibility mode for:" checkbox.
Select "Windows 7" from the drop down list.
Click OK, then OK again.
And now you're ready to install
UPDATE: You do also need to ensure that the java executable is in your path. If not, it will fail when trying to create the Java Virtual Machine.
UPDATE 2: And it MUST be the Java 1.7 executable in your path. 1.8 will fail.
Tuesday, June 7, 2016
Installing SmartCloud Control Desk 7.5.1 Demo Content on ICD 7.6
You can't do it
Use the maxdemo data that comes with the product. Install it initially using these steps:
https://www.ibm.com/developerworks/community/wikis/home?lang=en#!/wiki/Anything%20about%20Tivoli/page/How%20to%20install%20the%20sample%20data%20during%20IBM%20Control%20Desk%207.6%20installation
These steps are supposed to get it installed after the initial install, but I tried twice and failed both times:
http://www.ibm.com/support/knowledgecenter/SSLKT6_7.6.0/com.ibm.mam.inswas.doc/mam_install/t_mam_create_maxdemo_postinstall.html
So if you want demo data, which you do in some number of test/dev environments, simply install it at initial install time. It goes very smoothly.
But you can, mainly, with a little work
Additionally, you will have other problems, such as the following error when you try to create a new WORKORDER:
And there's no easy fix. So the demo data will let you play around with a lot of functionality, but the system is pretty unusable for anything else after you install it.
Add an attribute to the TICKET table
Download the package
Edit the package
Define your local content and Install
Create an XML file called ContentSource.xml in the C:\temp directory on your Smartcloud Control Desk server system that contains the following text:
<?xml version="1.0" encoding="UTF-8"?>
<catalog infourl="" lastModified="" owner=""
xmlns:tns="http://www.ibm.com/tivoli/tpae/ContentCatalog"
xmlns:xsi="http://www.w3.org/2001/XMLSchema-instance" xsi:schemaLocation=" ContentCatalog.xsd">
<catalogItem>
<version>7.5.1</version>
<type>mriu</type>
<name>Enter the name of package</name>
<description>Enter a description of the package here</description>
<homepage/>
<licenseurl/>
<category>Describe the category of the content</category>
<url>file:////C:\temp\TestPackage.zip</url>
</catalogItem>
</catalog>Edit the name and description and the category according to the content that you are installing. Change the file name in the URL to the name of the content pack zip file.Save the file.Copy the content pack zip file to the C:\temp directory on the server.Go to the ISM Content Installer application: System Configuration>IBM Content Installer.Click the New icon.Enter the location of the ContentSource.xml that you created in step 1 and a description. The file name in our example is: file:////c:\temp\ContentSource.xml Click Save.Click the newly created content source.Click the download link to install the content.
You've now got a good amount of demo content
Monday, June 6, 2016
IBM Control Desk for Service Providers
One of the many features of IBM Control Desk that separates it from the competition is its ability to support Service Providers. It does this by allowing you to secure information on a per-customer basis. For this blog post, I wanted to show a couple of multi-customer scenarios in the product. Specifically, I wanted to show a customer-specific user logging in and only seeing that customer's assets. Additionally, I wanted to show a software license being assigned to that customer-owned asset and how it appears. The screenshots associated with those are shown here:
Create a customer named ACME CORP
The Cust/Vendor field is farther down on the page.
Now create a user that is associated with that Person.
Now create a Security Group (SP) with any permissions you want, but specify "Authorize Group for Customer on User's Person record". I only granted Read access to the Assets application. And add your user to this group.
Here I'm logged in as the user, and can only see the one asset associated with ACME CORP.
Here I'm viewing the Licenses (SP) application for Adobe Acrobat and see that a license has been allocated to ITAM1010, which is the asset associated with ACME CORP.
Create a customer named ACME CORP
Now create a Person who is associated with ACME CORP.
The Cust/Vendor field is farther down on the page.
Now create a user that is associated with that Person.
Now create a Security Group (SP) with any permissions you want, but specify "Authorize Group for Customer on User's Person record". I only granted Read access to the Assets application. And add your user to this group.
Here I'm logged in as the user, and can only see the one asset associated with ACME CORP.
Here I'm viewing the Licenses (SP) application for Adobe Acrobat and see that a license has been allocated to ITAM1010, which is the asset associated with ACME CORP.
Friday, April 22, 2016
Configuring ITIC for use with IBM Control Desk 7.6
As shipped with ICD 7.6 (at least on Linux x86 64-bit), ITIC isn't quite configured correctly. When you try to run startFusion.sh, it will complain that it cannot file the main class. The problem lies in the init.sh script. Specifically, you need to change the following line:
FSNBUILD=7510
to
FSNBUILD=7600
Without this change, it's trying to find a file named IntegrationComposer7510.jar, which doesn't exist. In 7.6, the correct file is IntegrationComposer7600.jar.
Another thing to note is the URL of the BigFix server for use with the ITIC mapping is:
https://hostname-or-ipaddress:52311
The easiest way to work around the problem of having one VM on a NAT network and one on a host-only network in VMWare Workstation
The Situation
I have a BigFix environment with a Windows BigFix server on the host-only network, and I've got IBM Control Desk installed on a Red Hat VM on one of the NAT networks. I want to integrate the two for asset management, which requires the Integration Composer, which has to communicate with both servers simultaneously. (We've done an air-gapped integration for a couple of customers, but I wanted to use the out-of-the-box mechanism).
Bad Solutions
Some of the solutions that I considered, but threw out because of the work involved:
Change an IP address
Simply move one server to the other network and then add routes to communicate between different subnets IP addresses on the same network
Easy Solution
I added a network card on the NAT network to the BigFix Windows server. VMWare Workstation quickly suspended and resumed the VM, the adapter was seen, and it got a DHCP address on the NAT network. And then I could communicate between the two machines!
Tuesday, April 19, 2016
Installing IBM Control Desk v7.6 on Red Hat Enterprise Linux 6.6
I just had a difficult time installing ICD 7.6 on RHEL 6.6 and wanted to share one workaround that I used that finally got me around the prerequisite checker failures on Installation Manager.
I've done this successfully in a production environment, but in this case I'm installing this in a VM in my lab that's running under VMWare Workstation, and it's on a NAT network. Every time the Installation Manager runs the prerequisite checker, I kept getting a failure on network.fqdn, even though the hostname was absolutely set to a fully qualified domain name (icd76.mynet.foo). So I started up 'dnsmasq' locally and pointed to my own IP address as my DNS server. That allowed network.fqdn to PASS, but then network.dns would FAIL (!).
Figuring I have my networking configured "good enough" for my small test machine, I simply edited the following files:
PAD_07060000.cfg
PAW_07060000.cfg
in the directory /var/ibm/InstallationManager/bundles/plugins/com.ibm.tivoli.pae.prereq 1.0.1.20157141414/com/ibm/tivoli/pae/prereq/SystemRequirements/unix/ to change:
network.dns=True
to
network.dns=False
And then it worked like a champ!
How did you find those buried files?
If you cd to /var/ibm/InstallationManager/logs and run 'firefox index.xml', you get a great view of all of the Installation Manager log files. In the latest one, the completion message pointed me basically to that directory.IBM's Maximo 7.6 demo site is available
It's here:
It's just Maximo (enterprise) Asset Management, so it doesn't have any of the IBM Control Desk-specific content, but is a good place to check stuff out if you don't have a a local installation running.
Monday, March 14, 2016
How to Convert Remedy Time to UTC TimeStamp
This question came up on the INUG-USERS mailing list the other day, and our own IV Blankenship was the person who came to the rescue:
Question:
Using Impact WebService we capture the Ticket Close time from Remedy.
I observer Remedy sends the datetime in the below format. How to convert
the below format to NetCool UTC datetime format and display in NetCool
Dashboard.
*2016-02-23T20:45:09-08:00 -> with timezone embedded*
Answer:
The Impact ParseDate function is a wrapper for the Java SimpleDateFormat
class (
http://docs.oracle.com/javase/
The problem with your date string is the timezone. SDF and ParseDate by
extension expect it to be (+-)NNNN not (+/-)NN:NN.
Also, you have to escape the T using single quotes.
You did not say if you were using IPL or Javascript, but here is some IPL
that will work and verify that your data is in the expected format.
d="2016-02-23T20:45:09-08:00";
if(d like '(\d\d\d\d\-\d\d\-\d\dT\d\d:\
parts=RExtractAll(d,
'(\d\d\d\d\-\d\d\-\d\dT\d\d:\
tempDateString=parts[0]+parts[
Log(0,tempDateString);
f="yyyy-MM-dd'T'HH:mm:ssZ";
pd=ParseDate(tempDateString, f, null);
Log(pd);
}
else {
Log(0,"Unsupported date format!");
}
Monday, February 29, 2016
GBS IBM InterConnect 2016 Presentation
All,
This is the presentation Anthony Segelhorst gave at IBM InterConnect 2016.
Title: Gulf Breeze Discusses Application Monitoring Using IBM APM and Log Analysis
Link to Google Drive:
Download Link
This is the presentation Anthony Segelhorst gave at IBM InterConnect 2016.
Title: Gulf Breeze Discusses Application Monitoring Using IBM APM and Log Analysis
Link to Google Drive:
Download Link
Thursday, February 25, 2016
Thank you to everyone who came by our booth at IBM Interconnect
I want to personally thank everyone who came by our booth this week at IBM Interconnect. We got to see quite a few new faces and reconnect with old friends, partners and clients. We will rest up over the weekend then next week we'll start following up on the great conversations we had.
Here are a few of the pictures we took in Sales Academy, the Business Partner Summit and Interconnect itself.
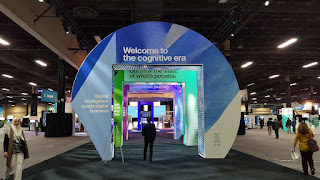


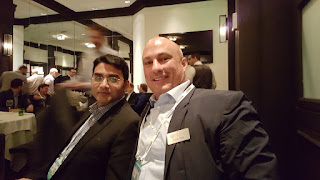
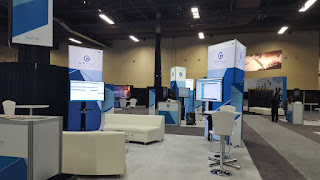
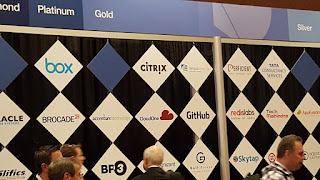

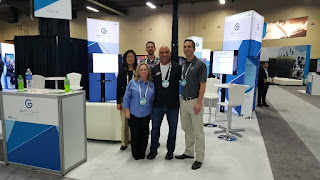
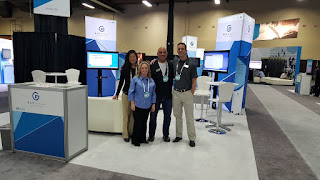
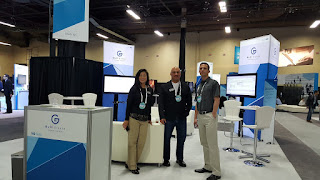
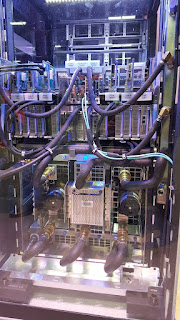
Here are a few of the pictures we took in Sales Academy, the Business Partner Summit and Interconnect itself.


Subscribe to:
Comments (Atom)


